


[Tutorial] Skybox - Environment Cube
A skybox is a method of creating backgrounds to make a computer and video game levels look bigger than it really is. When a skybox is used, the level is enclosed in a cuboid; and the sky, distant mountains, distant buildings, and other unreachable objects are projected onto the cube's faces (using a technique called cube mapping), thus creating the illusion of distant three-dimensional surroundings.
A skydome employs the same concept but uses either a sphere or a hemisphere instead of a cube.
Games often employ skyboxes. Traditionally, these are simple cubes with up to 6 different textures placed on the faces. By careful alignment, a viewer in the exact middle of the skybox will perceive the illusion of a real 3D world around it, made up of those 6 faces. http://en.wikipedia.org/wiki/Skybox_(video_games)
A good example of what the skybox and environment cube does.
Skydomes
For the in game background, SoaSE uses a spherical skybox, often referred to as a skydome, in conjunction with an environment cube for in game reflections on the models.
SoaSE uses 2 types of spherical UVs for the skydomes. The first set is a smaller size (4 mb textures) but separates the top and bottom islands to avoid the 'pole pinch'.
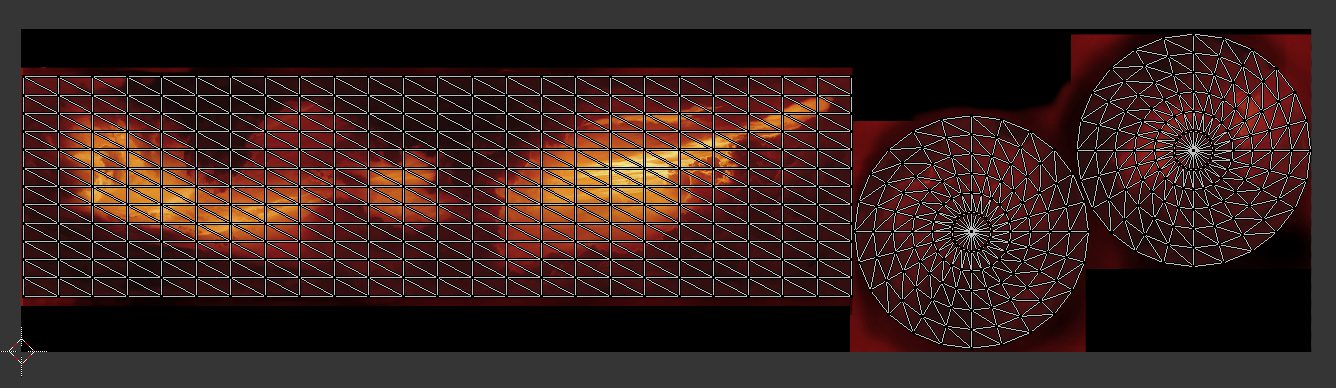
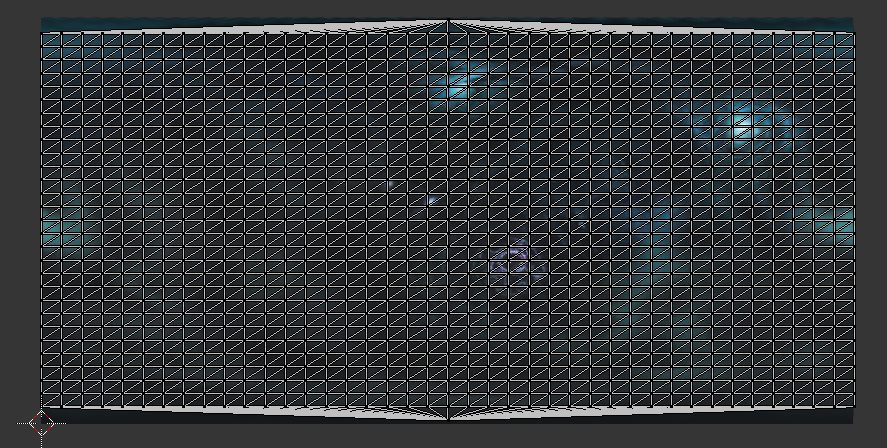
The larger texture set spheres (8 mb textures) UV unwraps the entire sphere onto a single flat UV. Pole pinch is an issue, but can be avoided by leaving the poles transparent for stars to show through, or using a solid colour. The alpha channel is the transparency mask.
To open, edit and save the textures in GIMP, the DDS plugin is required. The GIMP project files below can be opened without the plugin as the textures are already saved in the project.
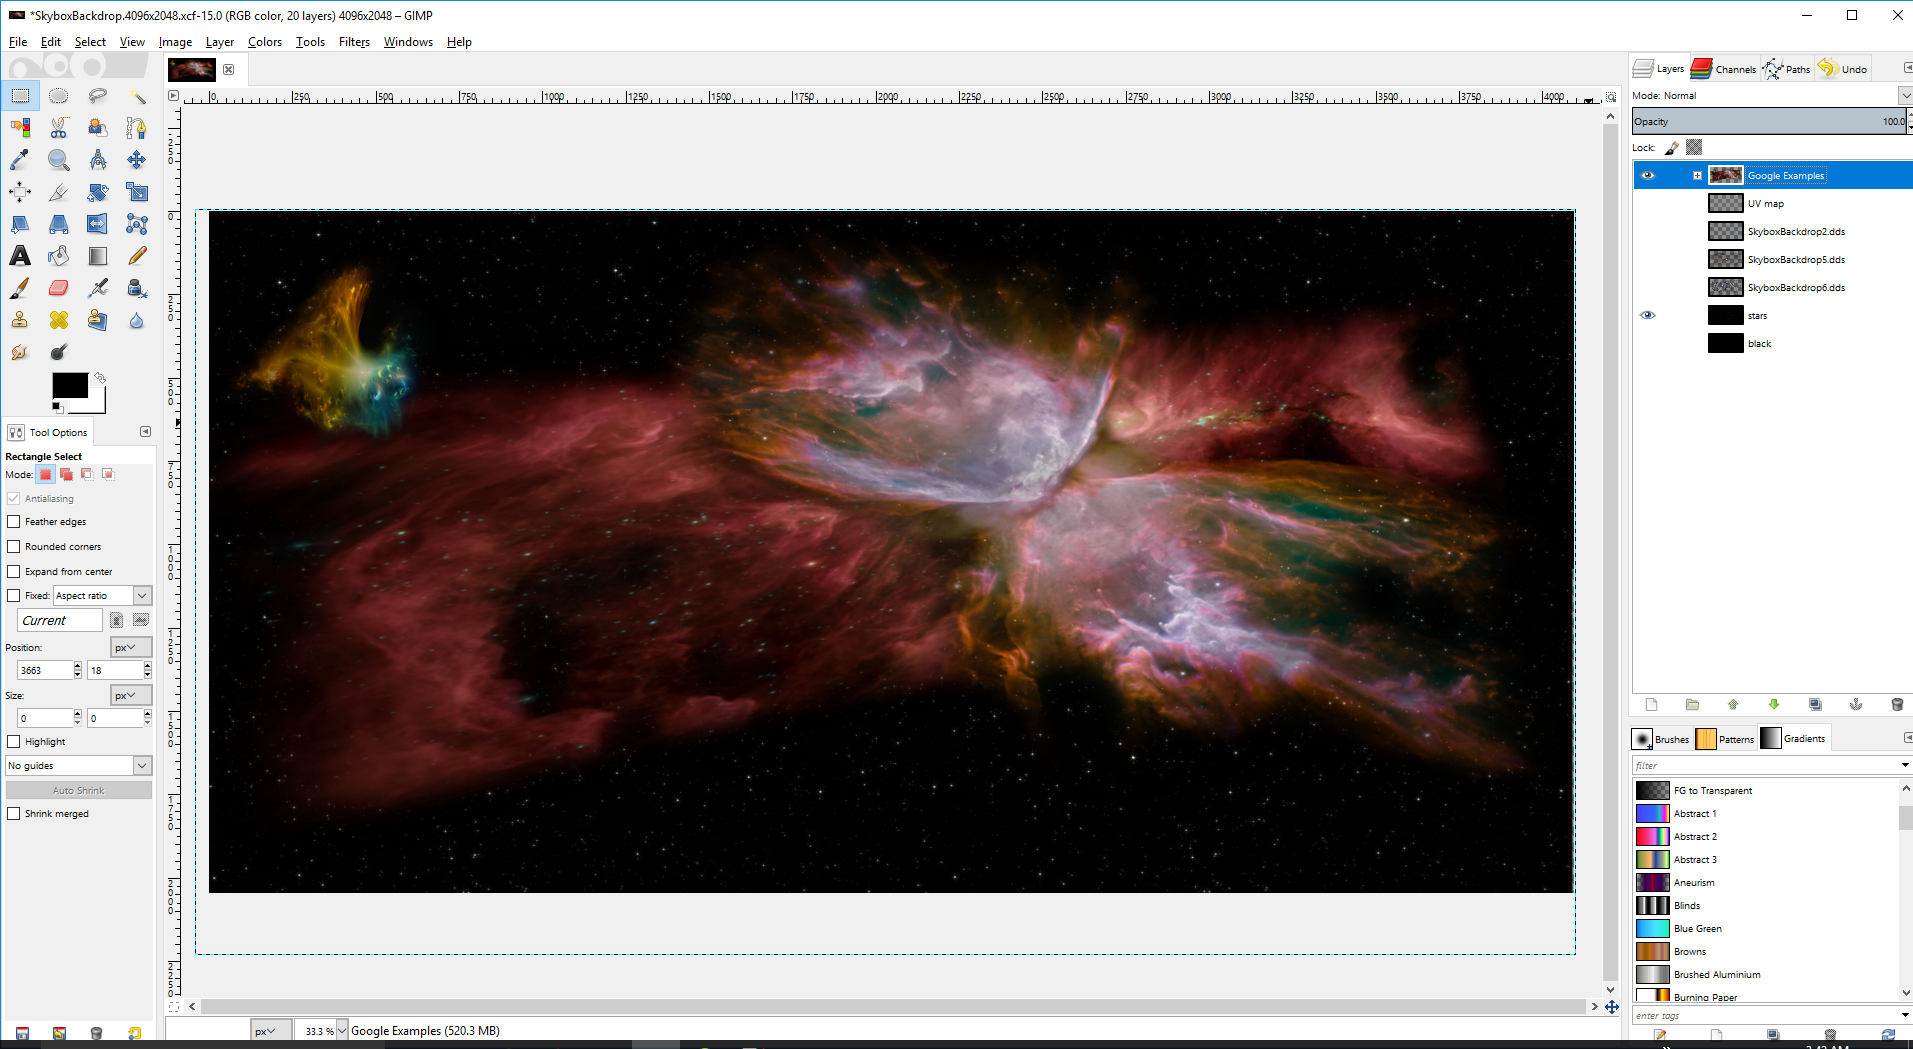 Includes the 3 stock 4096 x 2048 textures, a simple star field, the UV map, and a few nebula examples from a google image search.
Trinity (used mipmaps)
Rebellion (no mipmaps)
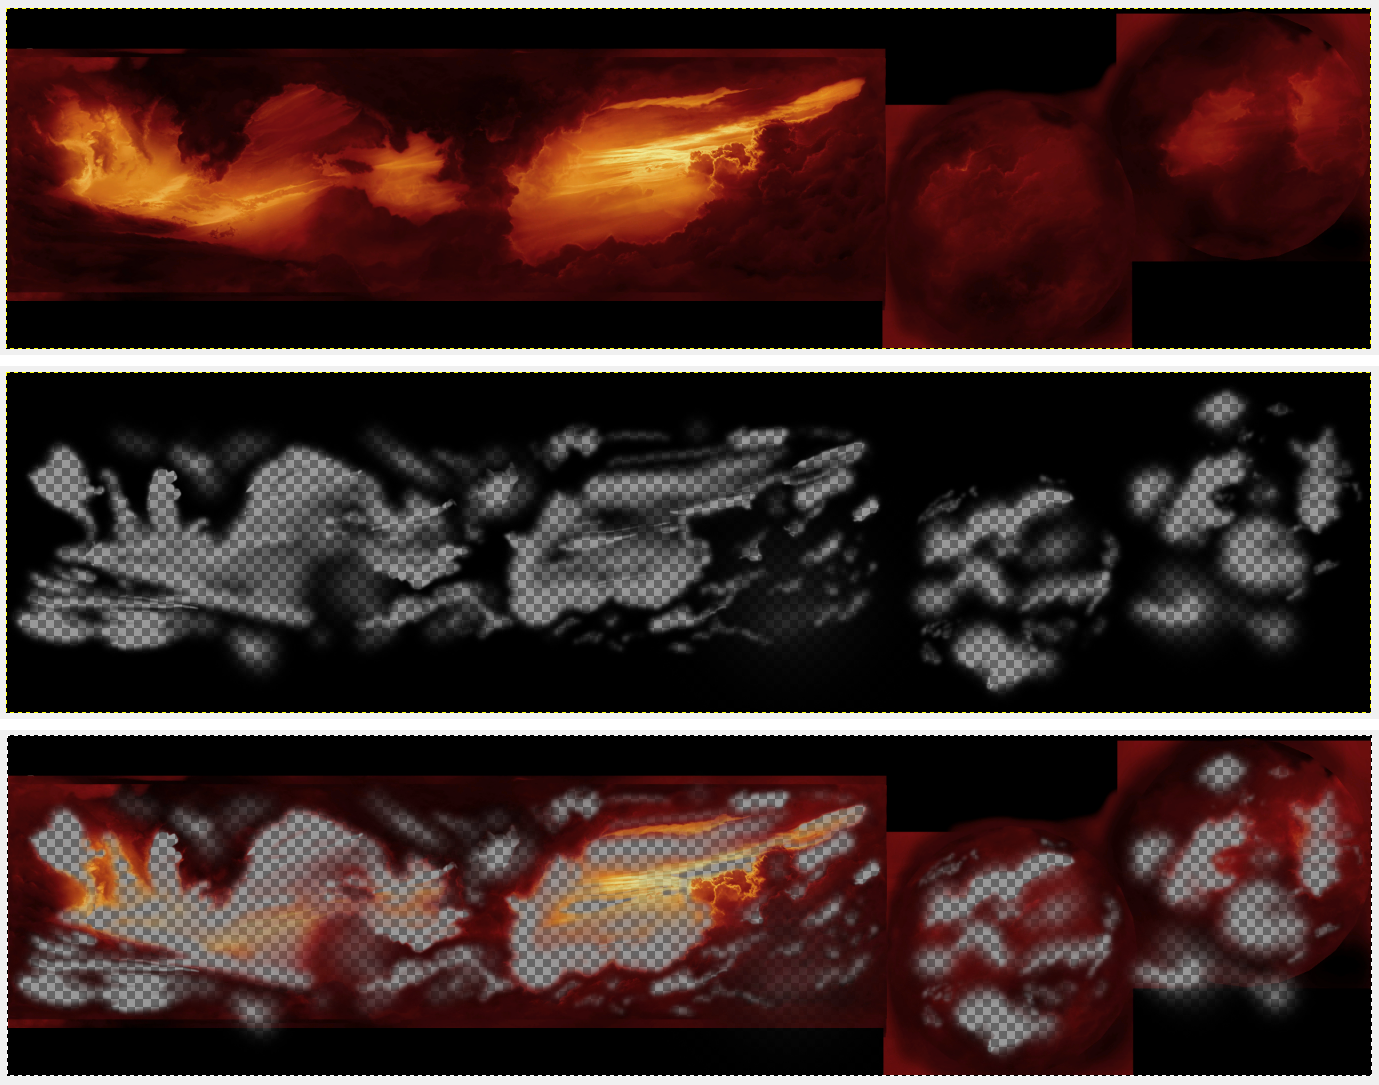
The Alpha mask
Once the skydome texture is complete, the alpha channel will need to be edited to allow the in-game star field to show through. The black areas on the alpha allow the texture to show, while the transparent areas allow the star field to show through. Applying the mask to the alpha keeps the original image intact.
 To edit the alpha channel, add a layer mask and apply the brush effect to the layer mask.
Under the Layers tab, right click the layer to edit and choose Add Layer Mask. A dialog box will ask you how you want the layer mask to be initialized. Presuming you'll start with a visible image and brush away the part you want transparent, the best choice is White (Full Opacity). Click Add.
![]()
Under the Layers tab, you should now see the white thumbnail of the layer mask, next to the thumbnail of the layer image. Click on the thumbnail to edit the layer mask. Choose your brush effect and the color black, and apply the transparancy.
If you switch to the Channels tab, you will see in real time how the alpha channel changes as you paint on the layer mask.
If you prefer to start with a transparent image and brush on the part you want visible, just start with a layer mask which is Black (Full Transparency) and apply your brush effect to the layer mask with the color white.
You can always switch back and forth between black and white paint to add or remove transparency on the layer mask.
When you want to return to editing the layer image instead of the layer mask, go back to the Layers tab and click on the thumbnail of the layer image.
After the layer mask is completed, export the texture to .dds, or export to raw .tga and use AMD's Compressionator. Save the GIMP project file.
For Sins: Rebellion's new skyboxes we also optimized them using AMD's Compressonator tool. It yielded significantly smaller file sizes with fewer compression artifacts/degradation than other tools. -- Yarlen
Environment Cube
A cube map is a series of six textures that are combined together in the shape of a cube to give the illusion of being surrounded by an environment. They are usually made from a series of six texture maps stitched together onto the sides of a cube and behave similarly to standard texture maps.
Remember that SoaSE only uses Environment Cubes for reflections on models in game.

There is a script for GIMP that will cut the above shapes into separate layers and save as a .DDS texture, but will not work on the style Blender creates shown below.
Cubemap Layers Generator
This 6 sided cube map image was created in Blender by placing a cube inside the textured sphere skydome with the spheres normals flipped (flip faces) so the texture points inward and gets projected onto the cube. This and other things are shown in the video tutorial below.
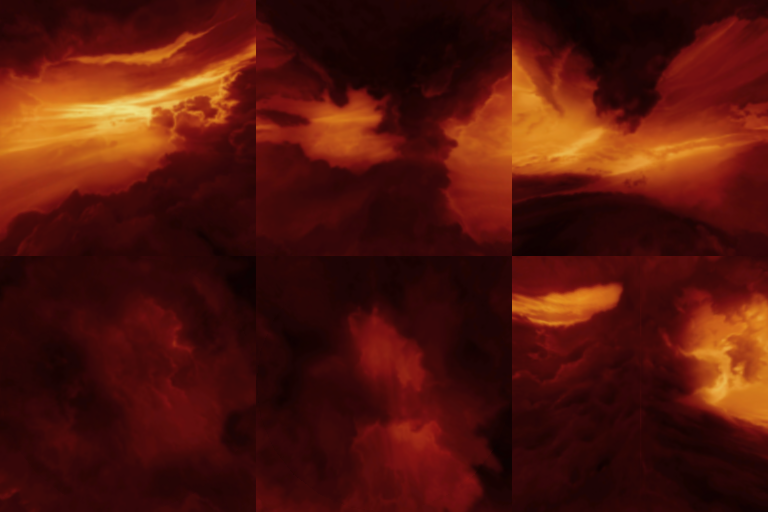
You can do any post-production here. It looks like SoaSE upped the brightness/contrast and played with the colour ramp a bit before chopping the images and placing them on the separate 256 x 256 layers.

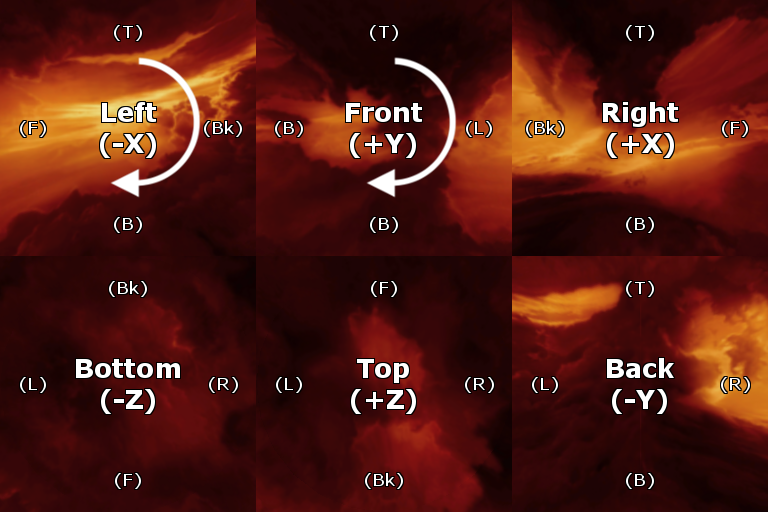
From Blender, the created cube faces are in the following order.
- Download to edit/customize this Gimp text layout file.
- Download the example Environment Map Gimp file.
- Download the Environment Map Blender scene file.
The 2 sections with the arrows need the UVs to be rotated 180°.


This is the order in GIMP of the imported skybox03environmentcube.dds from the SoaSE textures directory.
Load the six image clips into GIMP as separate layers.

When everything is setup, you can export the .dds file. Under 'Export As' select .dds and name your file (make sure the file name has the .dds extension). Some pop-up options will be presented if you have the .dds plugin installed correctly.
Inside the Environment Cube in Blender
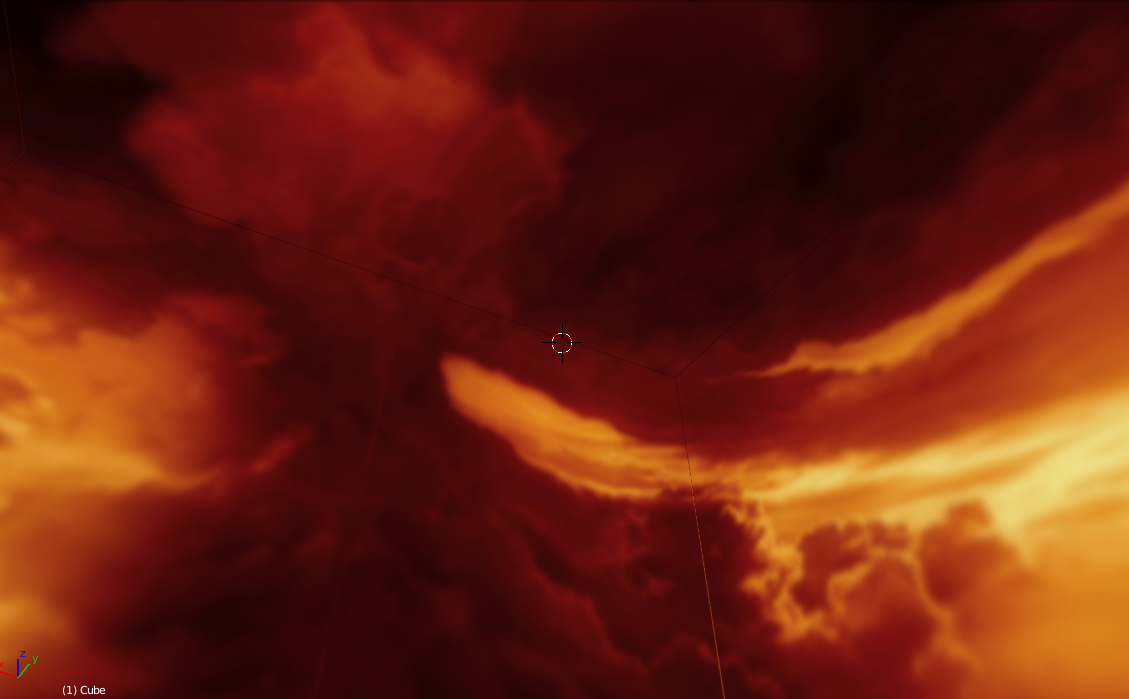
Blender Skydome and Environment Cube Tutorial
Note: If you create a new sphere with new UVs in Blender, it will have to be exported (.obj) and imported into XSI|Softimage for export to a SoaSE mesh. The included Blender file will have the 2 types of spheres and the existing SkyboxBackdrop's packed. I recommend copying one of the existing textures and painting the new one, and use the included Blender file to create the skybox environment cube for the in game model reflections.
If you plan on following the video below, note that he uses Blender particles to create stars. SoaSE has assets you can attach to these particles and follow along. Typical install directory.
C:\Program Files (x86)\Steam\steamapps\common\Sins of a Solar Empire Rebellion\Textures
- StarscapeStar0.dds
- StarscapeStar1.dds

Also note that the tutorial saves the images as .PNG which uses compression. Always save the textures as lossless Targa Raw (.TGA), then convert to .DDS for use in game. Always save the original assets in lossless form. BMP is also lossless, but does not allow transparencies.
Skydomes.blend (139 mb)
 Includes the 7 stock skydomes with textures packed, and a couple blank copies to experiment with. The EnvCube is created but not set-up. Follow the steps outlined in the video below.
See also:
Blender - Blender Render (Internal) vs Cycles Render
Just realize that the environment blender file scene will be in 'Blender Render' due to the limitations of the Cycles engine. This is explained in Render A Skybox Environment Map (Cycles Render) which does include a workaround. All the model scenes will be in the newer Cycles engine.
Blender Basics - 05 - Shading and Lighting
Blender Beginner Tutorial - Part 4: Material Nodes
Blender - Create some cool scenes to render your models
Render A Skybox Environment Map (Blender Render)
Render A Skybox Environment Map (Cycles Render)
How to Create a Realistic Earth in Blender (Blender Render)
How to Create a Realistic Earth in Blender (Cycles Render)


 Amazing how much less space textures take up if you take out the mip maps.